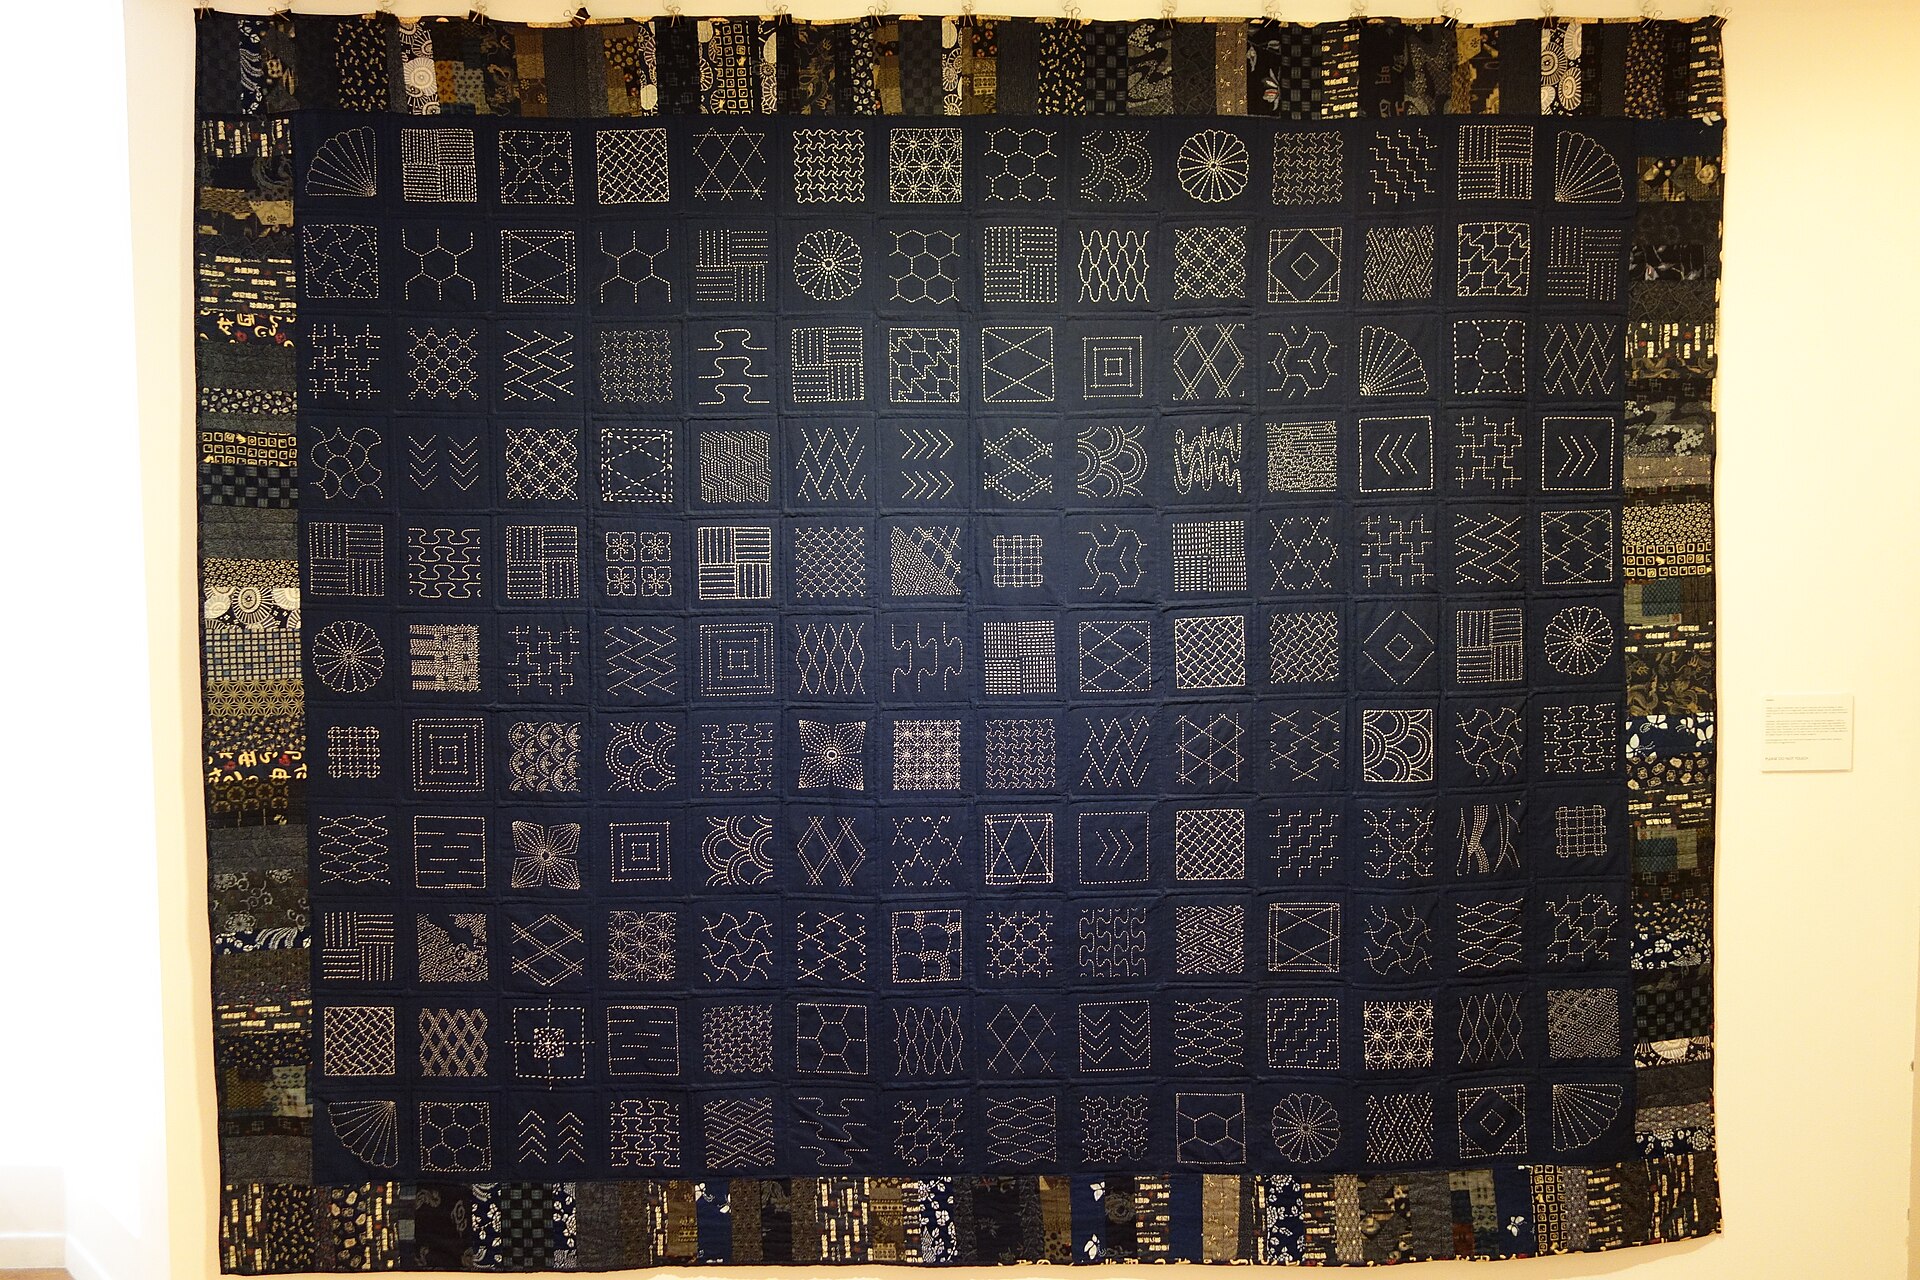
Sashiko looks intricate, but the technique behind it is wonderfully simple: it’s all one running stitch — the needle passing up and down through the cloth along a marked line — worked in a steady rhythm. The beauty comes from where the stitches sit and how evenly they run, not from any complicated stitchery. If you can sew a line of even stitches, you can stitch sashiko.
Before you start
You’ll want sashiko thread, a long sashiko needle, a thimble, plain fabric, and your pattern marked on the cloth. See Sashiko materials & tools for the full starter kit, and How to transfer a sashiko pattern to fabric to get your design onto the fabric first.
Loading the needle
Cut a single length of thread, about 50–60cm (20–24in), and thread the needle with one strand: sashiko thread is used single, not doubled the way you might for ordinary hand-sewing.
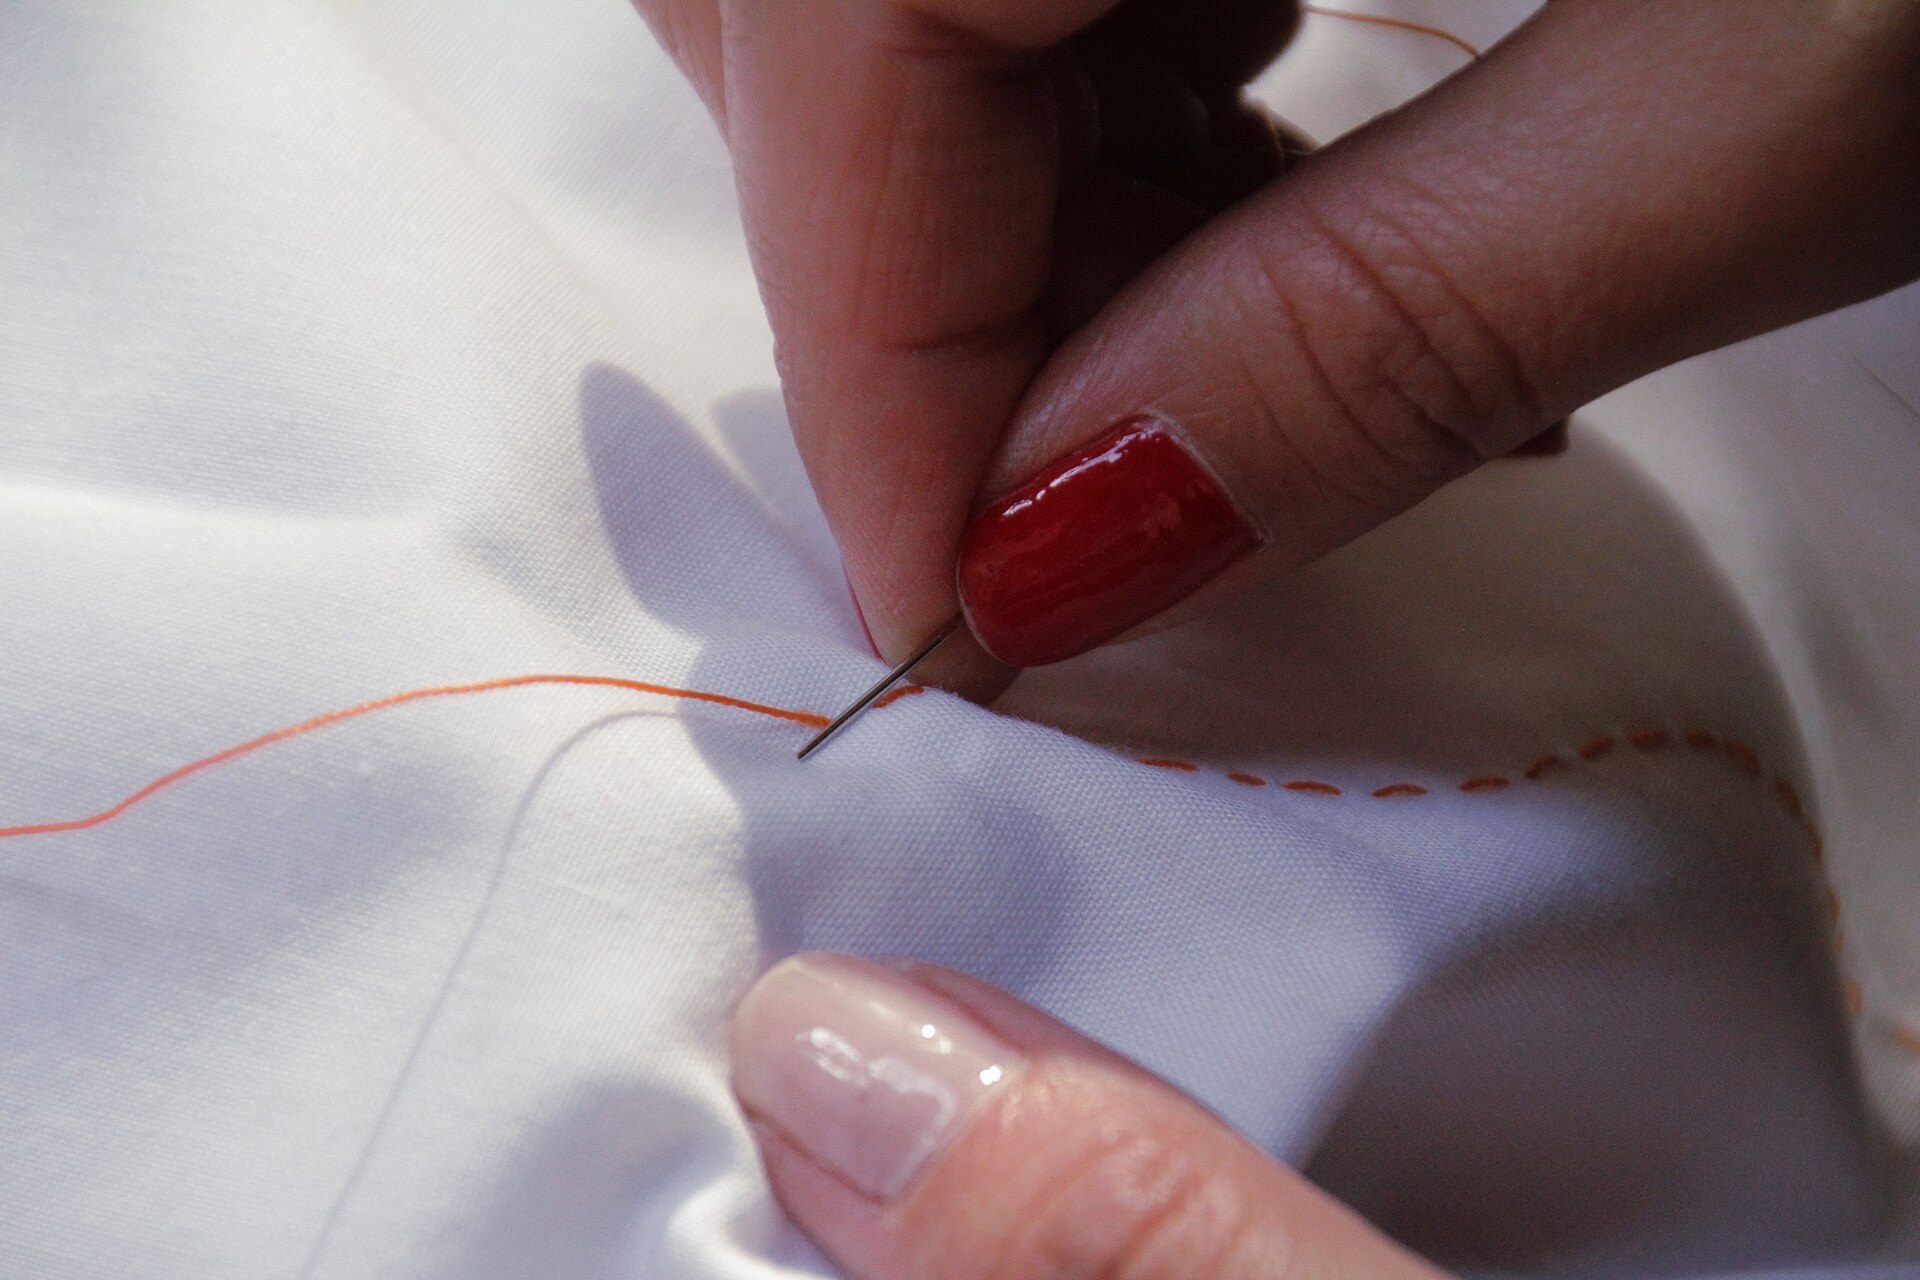
The heart of sashiko is loading several stitches onto the needle before you pull the thread through. Rock the needle through the fabric, gathering three, four, or more stitches along its length, then push it through — a thimble worn on the palm or middle finger does the pushing — and draw the thread after. This is why the thread is thick and tightly twisted and the needle is long with a large eye: so you can load a run of stitches at once and keep an even rhythm going.
The motion is a push, not a pull. You gather the cloth onto the still needle and let the thimble drive the needle through the folds, and only then draw the thread after it. Pulling the needle through one stitch at a time works, but it’s slower and the rhythm never really settles.
Stitch length and spacing
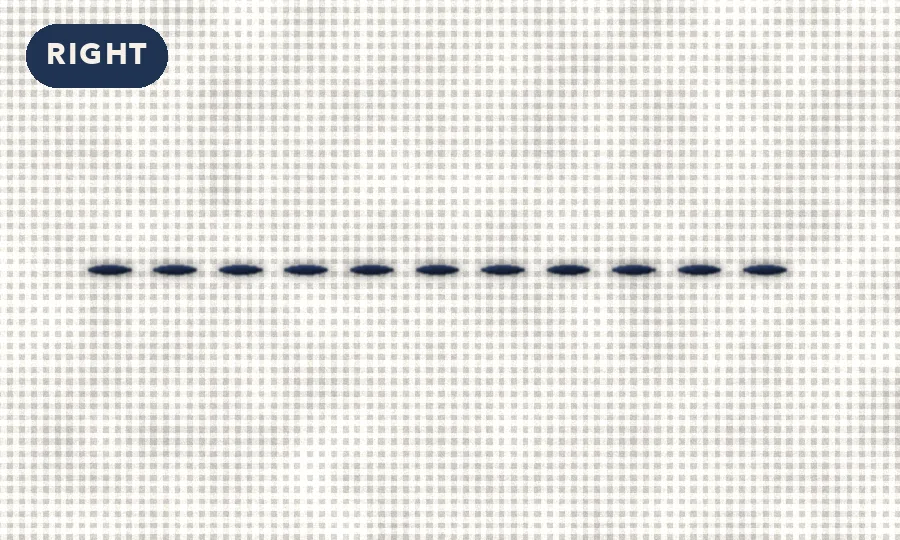
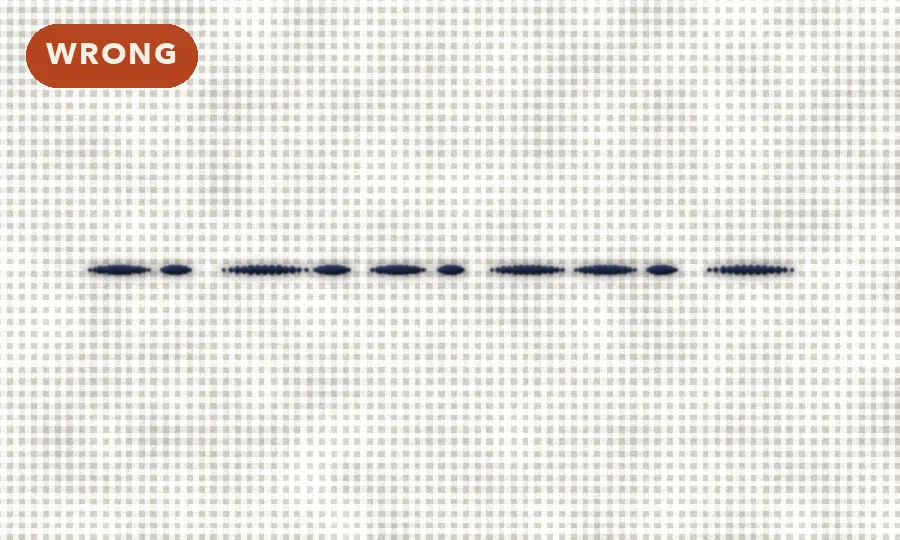
Aim for small, even stitches. By tradition the stitch on the front sits a little longer than the gap between them — a rough two-to-one feel — but consistency matters far more than exact size. Pick a length that suits your pattern and keep it the same all the way through; the eye reads evenness before it reads size.
There’s a second thing worth knowing: the stitch on the back of the cloth is shorter than the one on the front. That’s a natural result of loading the needle rather than something to fuss over, but it’s why the back of a finished piece looks like a lighter, dashed echo of the front.
Tension: let it breathe
Don’t pull the thread tight. After you draw each pass through, gently smooth the fabric along the line and let the stitches settle, so the cloth stays flat and doesn’t pucker. Even, relaxed tension is what gives sashiko its calm, level surface.
Starting and ending a thread
Secure your thread with a small knot or a couple of backstitches, and finish by weaving the tail under a few stitches on the back. Traditionally many stitchers skip the knot altogether: if your piece has two layers of cloth, you can bury the tail between the layers with a couple of tiny backstitches — hidden from the front, with nothing to catch or show through. A small knot is perfectly fine when you’re starting out, so use whichever feels easier.
When a thread runs out mid-line, don’t knot it off and start fresh in the same hole. Instead overlap the two threads: let the old tail and the new thread share a short run of stitches along the back, so the join disappears into the line and the front stays unbroken.
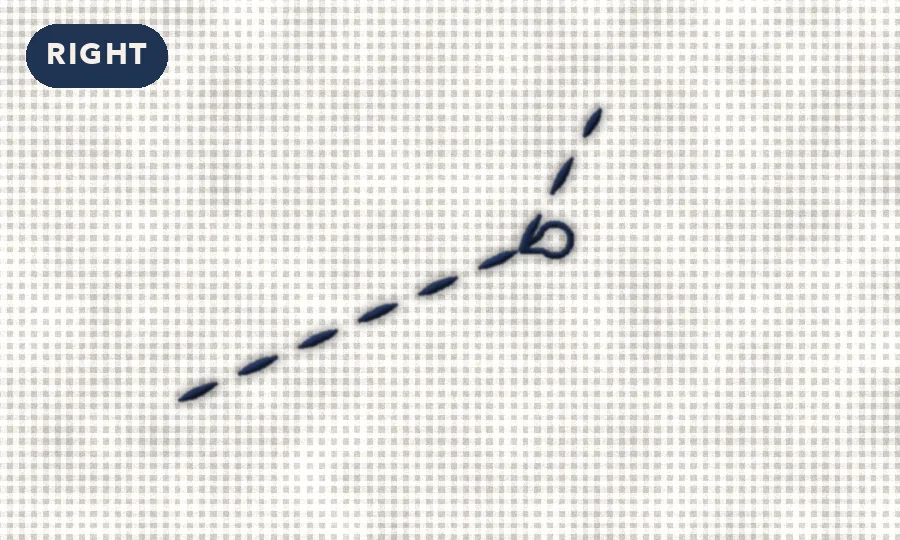
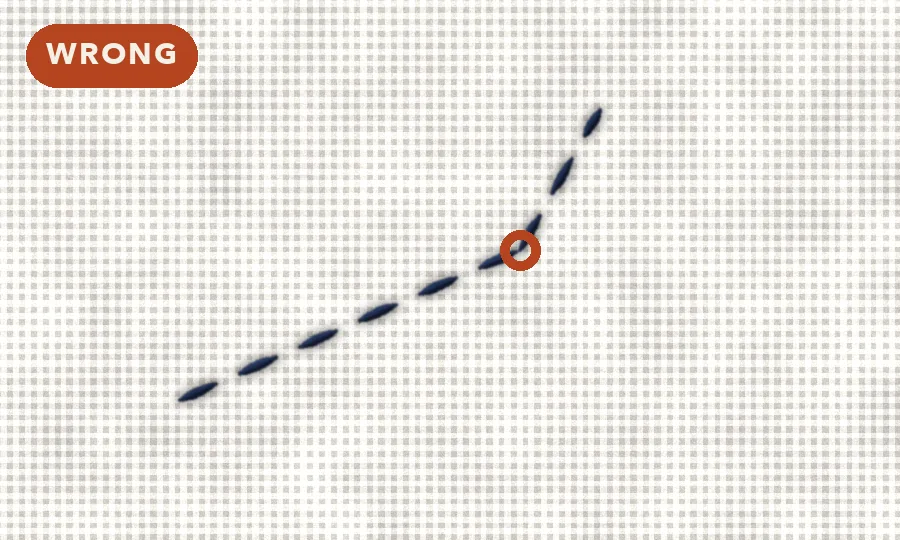
When you need to carry the thread to another part of the design, strand it loosely across the back — and at a sharp change of direction, leave a little loop on the back so the work doesn’t pucker.
Getting the stitch right
A handful of small habits are what separate crisp sashiko from messy — and nearly all of them are about how the stitches behave where lines turn and cross.
Corners
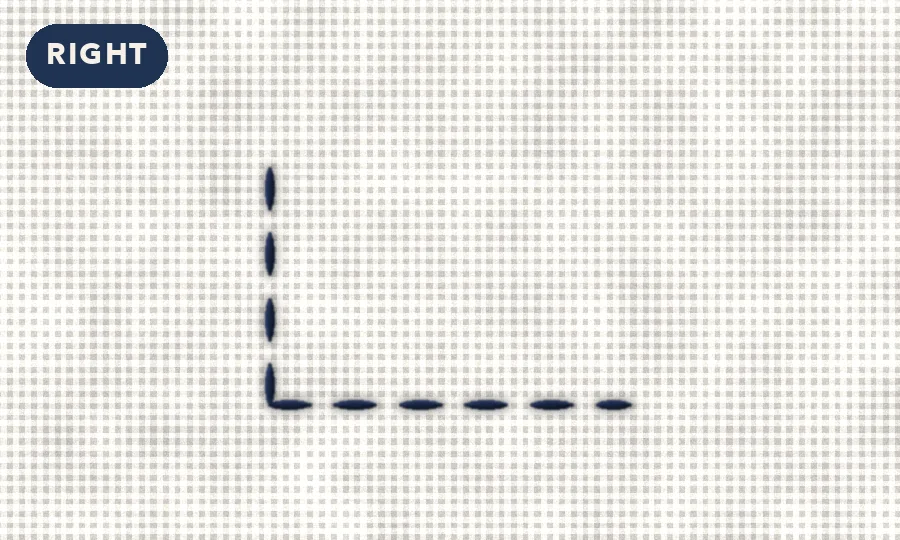
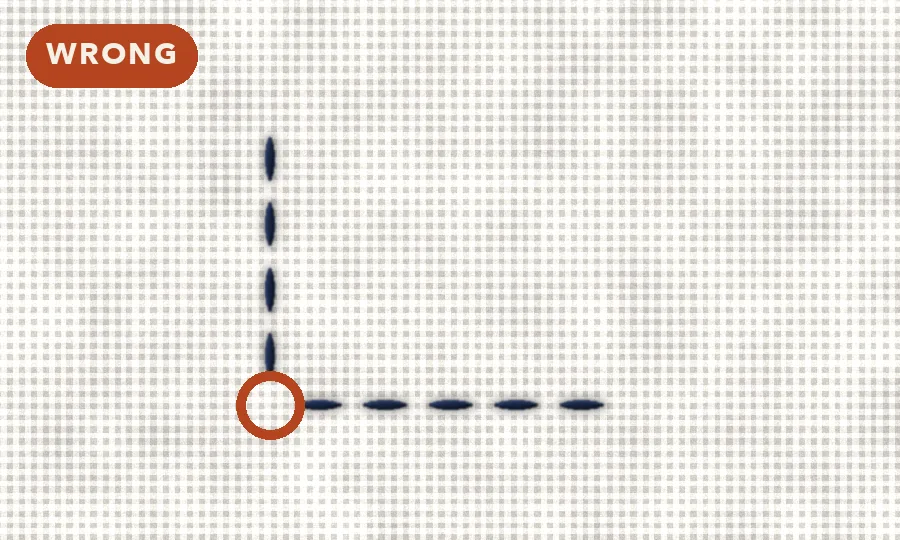
At a corner, let the last stitch land right on the turn. A stitch on the point keeps it sharp and defined; a gap straddling the corner rounds it off and softens the whole motif.
Crossings
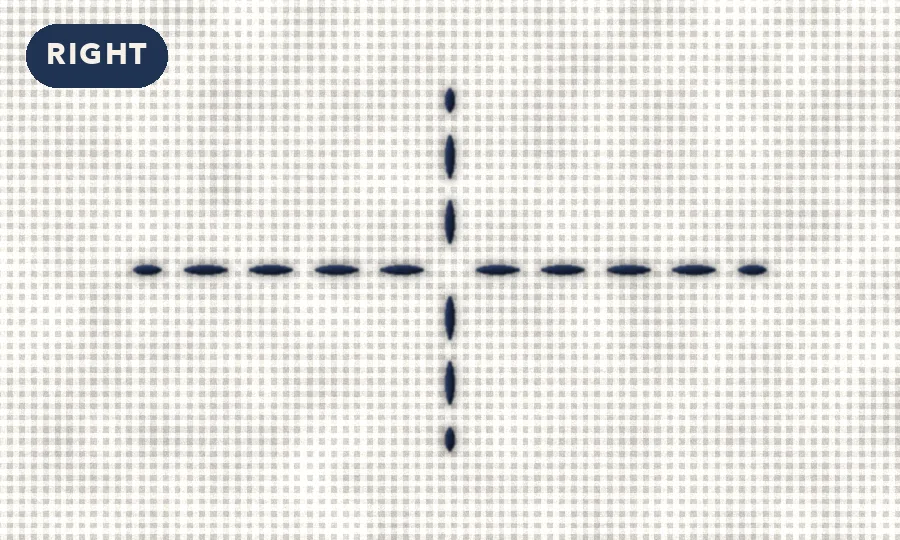
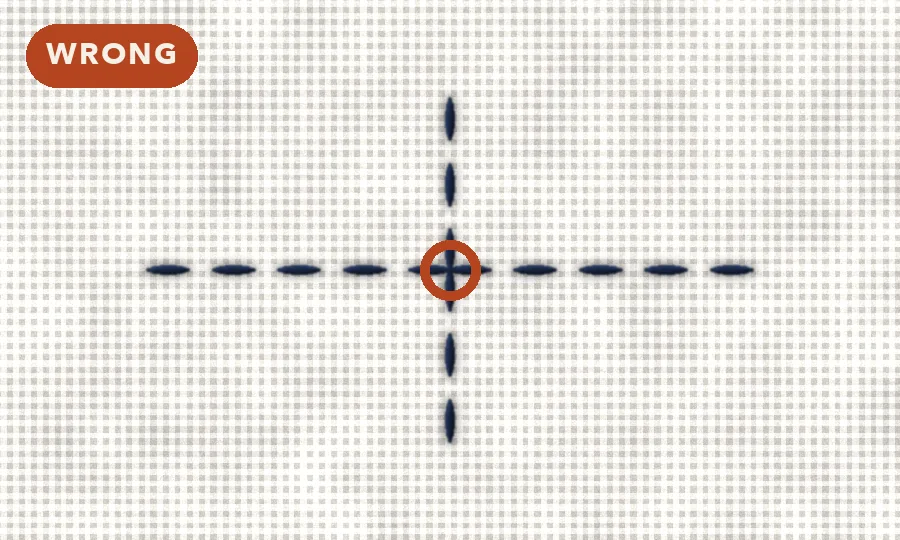
Where two lines cross, leave a slightly longer gap so no stitch sits over the crossing. Thread riding over thread there makes an ugly little lump and a weak spot — and try not to start a new thread at a crossing, either.
Star centers
Where many lines meet at once — the heart of an asanoha, for instance — keep the very middle open rather than driving every stitch into one point, which knots up into a hard little bump.
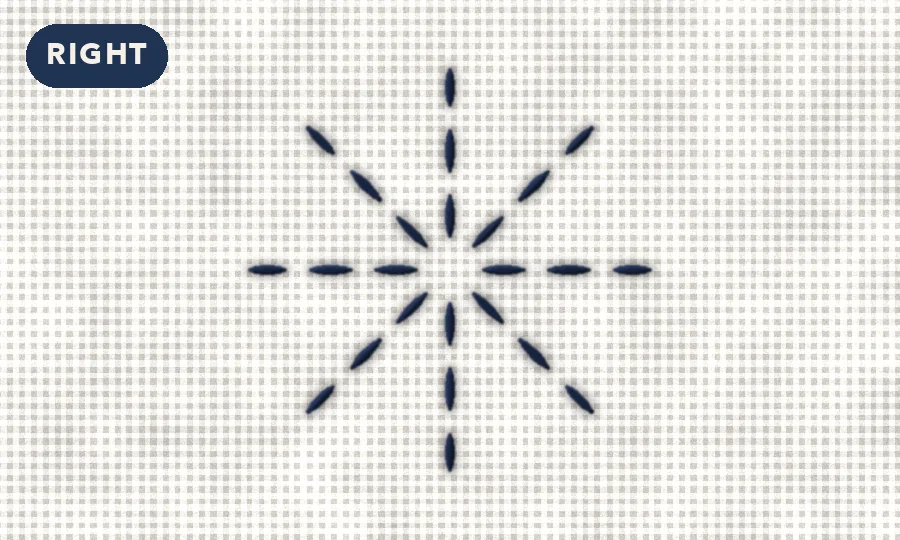
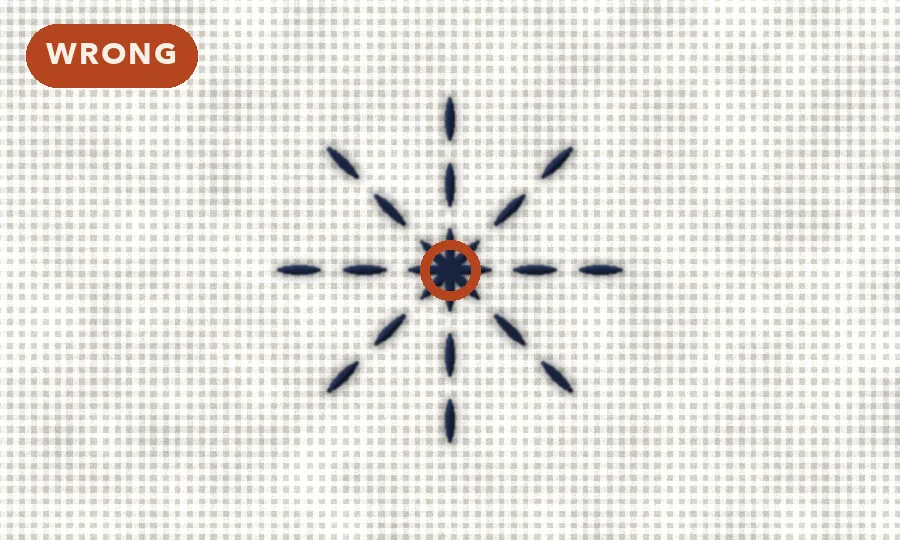
A little slack on the back
At a sharp change of direction, leave the carried thread a little loose on the back — a small loop of ease — before you carry on. Carry straight on into the new direction with no loop and the back pulls tight, cinching the cloth into a pucker.
One thing that changes with the pattern is what the back looks like: in moyozashi the threads cross on the back, not the front, while grid-based hitomezashi is worked one row at a time, the stitches meeting to build the design. Both are still the same simple running stitch.
Finding your rhythm
Start on a scrap of fabric before your real piece. A few rows in, the rocking, gathering, pulling motion becomes second nature — and that quiet, repetitive rhythm is a good part of why people love sashiko in the first place.
When you’re ready, pick a motif from the pattern library and begin.